The Asphalt Shingle Roof Installation Process Explained Step by Step
People searching for asphalt shingle roof installation often want to understand the process and find experienced local contractors who can handle each step professionally.
Understanding the asphalt shingle roof installation process explained step by step can provide property owners with valuable insights into what to expect when upgrading or replacing their roof. Whether you're preparing for a new installation or simply want to learn more about the work involved, knowing the key stages can help you make informed decisions. Property owners in the area often explore this topic to better coordinate with local contractors, ensure the project aligns with their needs, and gain confidence in the quality of the work being performed.
Local contractors who specialize in asphalt shingle roof installations bring practical expertise to each phase of the process, from initial assessment to final inspection. Connecting with experienced service providers can help ensure the job is done efficiently and to a high standard, giving property owners peace of mind. Keep reading to discover the step-by-step details of the installation process and how local professionals can assist in delivering a durable, reliable roof for your property.
- Asphalt shingle roof installation - homeowners considering a roof upgrade can rely on local contractors to guide them through the process step by step.
- New asphalt shingle roofing - property owners replacing an aging roof can expect local pros to handle each phase with precision and care.
- Roof replacement with asphalt shingles - those needing to remove old roofing materials and install new shingles benefit from experienced local service providers.
- Residential asphalt shingle roofing - families seeking durable and affordable roofing options can find local pros ready to manage the installation process.
- Asphalt shingle roof upgrade - individuals upgrading their roof for better performance can connect with local contractors skilled in the detailed installation steps.
When homeowners search for the asphalt shingle roof installation process explained step by step, they are often seeking a clear understanding of what to expect when replacing or installing a new roof. This topic typically relates to property owners planning a roof upgrade, repair, or new construction project. Many are concerned about the overall scope, the sequence of work involved, and how the different phases come together to ensure a durable and reliable roof. Understanding this process helps homeowners make informed decisions, evaluate proposals from local contractors, and ensure that the work aligns with their expectations and property needs.
The process of installing an asphalt shingle roof often connects to various property plans and potential problems. For instance, homeowners may be addressing issues like leaks, storm damage, or aging roofing materials that require replacement. Others might be installing a new roof as part of a larger renovation or home improvement project. Common property types that come up include single-family homes, multi-family residences, and small commercial buildings. Each of these properties may have unique structural considerations, but the fundamental installation steps remain similar, making it essential to work with local service providers who understand the specific requirements and challenges of different property types.
Understanding the asphalt shingle roof installation process explained step by step can also clarify the roles of local contractors in completing the project efficiently. These professionals handle tasks such as removing the existing roof, inspecting and preparing the underlying structure, installing new roofing materials, and ensuring proper sealing and flashing. Homeowners benefit from knowing that experienced local pros follow a systematic approach to ensure the roof is installed correctly and performs well over time. Knowing what each step involves can also help homeowners prepare for the project, ask relevant questions, and better evaluate the quality of the work proposed by different service providers.
Ultimately, the installation process is a vital part of maintaining and protecting a property’s value and safety. Homeowners considering a new asphalt shingle roof or replacement often want to understand how the work progresses from start to finish. By connecting with local pros who are familiar with the detailed steps involved, property owners can gain confidence that their project will be managed professionally and efficiently. Whether addressing storm damage, upgrading an aging roof, or completing a new build, understanding the asphalt shingle roof installation process explained step by step helps ensure the project aligns with the homeowner’s goals and property needs.
Roof Deck Repair and Replacement - this project involves preparing and repairing roof decks, a skill that is essential for proper asphalt shingle roof installation and ensuring a secure foundation.
Flashing and Waterproofing Projects - installing flashing and waterproofing systems requires similar planning and precise tool use as asphalt shingle roofing to prevent water intrusion.
Attic Ventilation System Installation - proper ventilation installation complements roofing projects by protecting shingles and extending roof lifespan, requiring similar planning and execution skills.
Gutter and Drainage System Installation - setting up effective gutters and drainage systems involves understanding roofing layouts and working with roofing materials to prevent water damage.
Slope and Roof Structure Assessment - evaluating roof slopes and structures is a key step that overlaps with the planning phase of asphalt shingle roof installation services.
Skylight and Roof Window Installation - installing skylights involves precise cutting and sealing techniques similar to those used in asphalt shingle roof projects to ensure weather-tightness.
When comparing local contractors for asphalt shingle roof installation, it is important to consider their experience with similar projects. Homeowners should look for service providers who have a proven track record of successfully completing roof installations similar in scope and style to their own. An experienced contractor is more likely to be familiar with the specific steps involved in the asphalt shingle roof installation process explained step by step, ensuring that each phase-from preparing the roof deck to final inspections-is handled efficiently and correctly. Verifying references or reviews from previous clients can provide insight into the contractor’s ability to deliver quality work and adhere to project expectations, helping homeowners gauge their reliability and expertise.
Clear written expectations are essential when evaluating local contractors for asphalt shingle roof installation services. Homeowners should seek detailed proposals or written estimates that outline the scope of work, materials to be used, and the sequence of installation steps. This transparency helps prevent misunderstandings and ensures that everyone is aligned on the project’s objectives. Good communication throughout the process is also a key indicator of a reputable service provider; contractors who are responsive, transparent, and willing to clarify any questions demonstrate professionalism and a commitment to customer satisfaction. Establishing open lines of communication early can help homeowners feel more confident in the project’s progress and outcome.
Reputable references and a history of positive interactions are vital factors when choosing local pros for asphalt shingle roof installation. Homeowners should ask potential contractors for references or examples of completed projects similar to their own, preferably with a focus on the installation process explained step by step. This allows for a better understanding of the contractor’s workmanship and their ability to manage all phases of the roofing process smoothly. Additionally, good communication skills and professionalism are often reflected in how a contractor responds to inquiries and provides updates. By prioritizing experience, clear expectations, and reputable references, homeowners can make more informed decisions when selecting service providers to handle their asphalt shingle roof installation.
Property owners often search for the asphalt shingle roof installation process explained step by step when they are planning practical projects around their homes and businesses. Local pros provide Asphalt Shingle Roof Installation services for everyday jobs and straightforward project options.

Understanding the asphalt shingle roof installation process explained step by step can help property owners in the area make informed decisions when considering a roof replacement or upgrade. Homeowners often look up this topic to better understand what’s involved in the project, especially when preparing for a major home improvement. Local contractors who specialize in asphalt shingle roofing can guide property owners through each phase, from initial removal of the old roof to the final inspection, ensuring the work is completed properly and efficiently.
Many property owners seek out information on the installation process to ensure they’re choosing reputable service providers who follow standard procedures. Knowing what to expect can also help in planning for potential disruptions or understanding the importance of quality materials and workmanship. Local roofing experts are equipped to handle every step of the process, providing professional installation that aligns with industry best practices and local building requirements.
What are the main steps involved in the asphalt shingle roof installation process explained step by step? The process typically includes removing the old roofing material, inspecting and repairing the roof deck, installing underlayment, laying down new asphalt shingles, and finishing with ridge caps and detailing. Local contractors follow these steps to ensure a proper and durable installation.
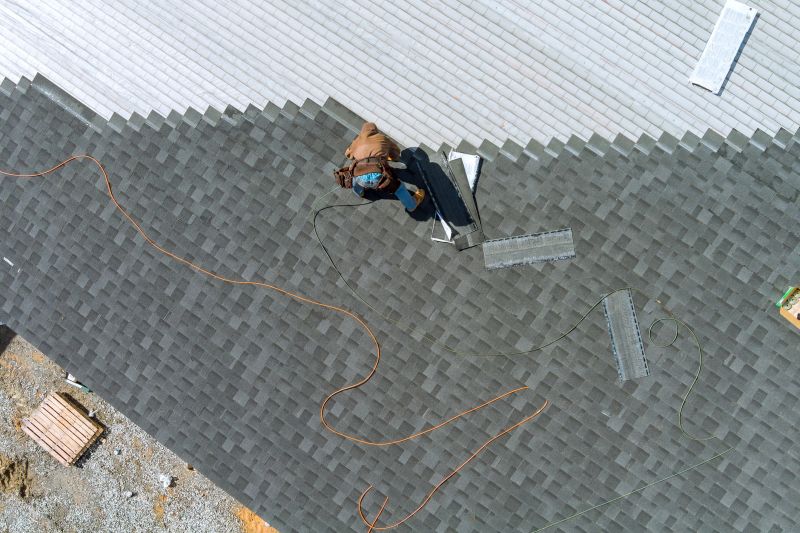
How do local contractors prepare the roof before installing asphalt shingles? They start by removing existing roofing layers, inspecting the roof deck for damage, and making necessary repairs. Proper preparation helps ensure the new shingles are installed on a solid, even surface for optimal performance.
What materials are used during the asphalt shingle roof installation process? Contractors use asphalt shingles, underlayment, roof decking, flashing, and nails or staples. These materials are selected to provide weather resistance and longevity for the new roof.
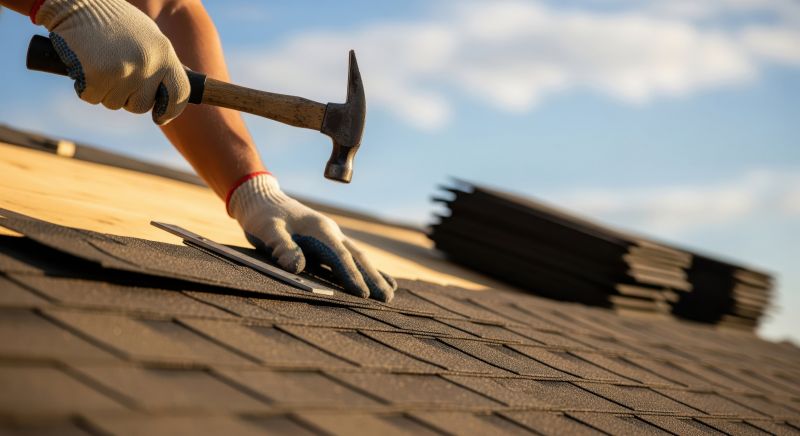
How do local service providers ensure the asphalt shingles are installed correctly? They follow manufacturer guidelines and industry best practices, including proper nailing techniques, adequate ventilation, and secure fastening, to ensure the shingles are installed properly and will last.
What is the role of underlayment in the asphalt shingle roof installation process? Underlayment acts as a protective barrier against moisture and enhances the roof’s durability. It is installed over the roof deck before laying the asphalt shingles to improve weather resistance.
Understanding the roof inspection phase - property owners can learn to identify common issues that may require attention before installation begins, ensuring a smoother process with local contractors.
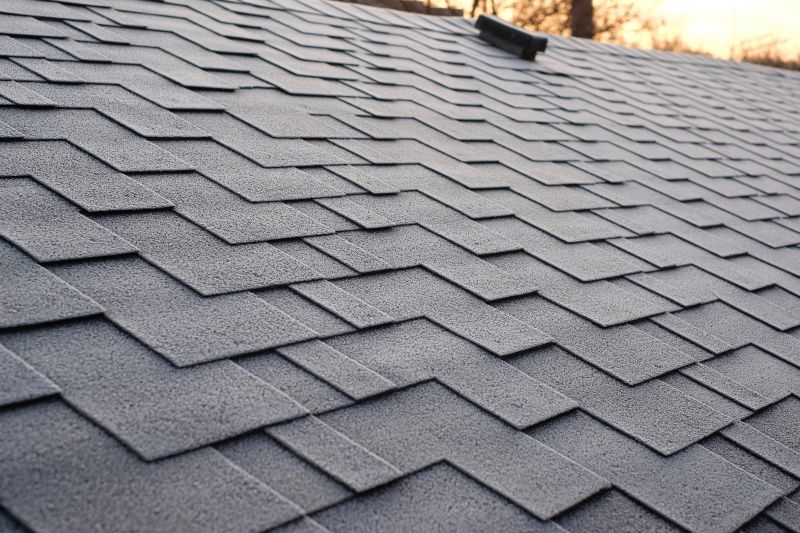
Selecting the right shingles - choosing asphalt shingles that match the property's style and durability needs helps ensure a successful installation handled by experienced service providers.
Preparing the roof surface - property owners can coordinate with local pros to clear debris and ensure the roof is ready for the new shingles, promoting proper adhesion and longevity.
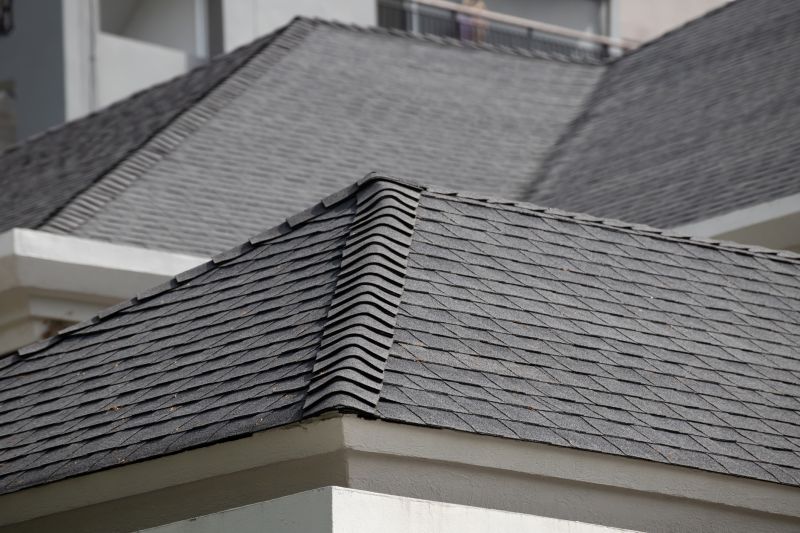
Final inspection and cleanup - understanding the importance of a thorough review and debris removal can help property owners ensure the installation meets expectations and maintains a clean appearance.
If you are thinking about the asphalt shingle roof installation process explained step by step for a property, this guide is meant to help you understand this topic, the typical project types, and how different options might fit your plans.
When you are ready, you can use the quote form on this page to share a few details about your project. From there, local pros can review the basics and follow up with options that match what you have in mind.